How to master the ultimate sourdough bread bowl recipe in just 3 days
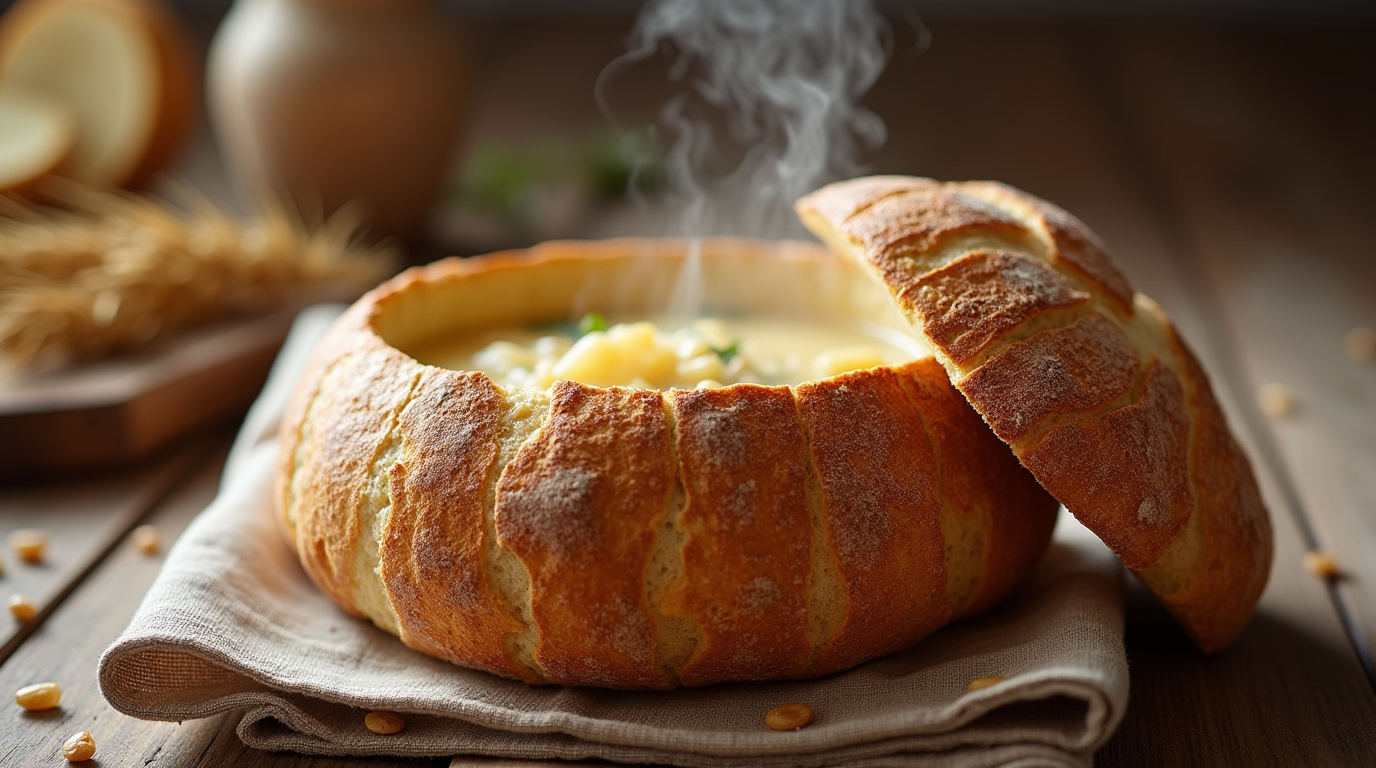
Have you ever wondered how restaurants serve those perfectly golden, crispy-on-the-outside and soft-on-the-inside sourdough bread bowls that are so irresistible? What if I told you that making your own sourdough bread bowl recipe at home is not only possible but also surprisingly simple? With just a few key ingredients and some patience, you can bake these delicious edible bowls right in your kitchen. Ready to discover the secret? Let’s dive in!
Table of Contents
Overview sourdough bread bowl recipe
This sourdough bread bowl recipe is special because it combines the classic tangy flavor of sourdough with a texture that’s both chewy and crusty. Unlike other recipes, this one doesn’t require many ingredients, but it does take time—about three days from start to finish. Don’t worry; most of that time involves letting the dough ferment naturally, which means less hands-on work for you! The difficulty level is moderate, but once you get the hang of it, baking sourdough bread bowls becomes second nature.
The beauty of this recipe lies in its versatility. These bowls are perfect for serving soups, stews, or even as a standalone snack. Plus, sourdough offers health benefits such as better digestion and improved nutrient absorption thanks to its natural fermentation process 6.
Essential Ingredients
To make these amazing sourdough bread bowls, you’ll need the following key components:

- Active Sourdough Starter : This is the heart of your bread bowl. It contains wild yeast and bacteria that give sourdough its distinctive tangy flavor. Ensure your starter is bubbly and active before starting.
- Bread Flour : High protein content ensures a chewy texture. If unavailable, all-purpose flour works as a substitute, though the texture may differ slightly.
- Water : Preferably filtered water to avoid chlorine affecting the fermentation process.
- Salt : Enhances flavor and strengthens gluten structure.
Substitutions and Variations
If you don’t have bread flour, use all-purpose flour instead. For added flavor, consider incorporating herbs like rosemary or thyme directly into the dough. You could also add seeds such as sesame or poppy for extra crunch.
Step-by-Step Instructions sourdough bread bowl recipe


Day 1: Preparing Your Levain
Start by creating a levain, which acts as the leavening agent for your bread. Mix 20g of active sourdough starter with 80g of water and 80g of bread flour until homogeneous. Let this mixture rest at room temperature for about 12 hours 3.
Day 2: Mixing and Bulk Fermentation
In the morning, weigh out 250g of water and 500g of bread flour into a large mixing bowl. Add the fully ripened levain from Day 1 and mix until no dry bits remain. Once combined, add 10g of salt and knead the dough for about 5 minutes. Perform stretch-and-fold exercises every 30 minutes during the first two hours to develop gluten structure 8.
Let the dough ferment at room temperature for around 4-6 hours, depending on the warmth of your kitchen. During this period, perform another set of stretch-and-folds after the first hour.
Day 3: Shaping and Proofing
Divide the dough into equal portions based on how many bread bowls you wish to make. Shape each piece into a round form and place them seam-side down onto floured couche or tea towels. Allow the shaped loaves to proof for approximately 2-4 hours, or until they pass the poke test (the indentation should spring back slowly).
Preheat your oven to 425°F (220°C) while placing a Dutch oven inside to heat up. When ready, transfer the proofed dough into the hot Dutch oven using parchment paper or a silicone sling, score an “X” shape on top, and bake covered for 20 minutes. Uncover and continue baking for another 15-20 minutes until deeply browned 1.
Assembly
Once baked, let the bread bowls cool completely before slicing open. To serve, fill them with your favorite soup or stew. Presentation matters! Consider garnishing the tops with fresh herbs or grated cheese for added appeal.
For an elegant presentation, try filling the bowls with creamy tomato basil soup or hearty beef stew. You can also drizzle olive oil over the edges for a golden sheen 6.
Storage and Make-Ahead Tips
Store leftover bread bowls in a paper bag at room temperature for up to two days. For longer storage, freeze slices individually wrapped in plastic wrap and then placed in freezer bags. Reheat frozen slices in a toaster or oven for freshness.
If planning ahead, prepare the dough up to the shaping stage and refrigerate overnight. This slows down fermentation and enhances flavors further.
Recipe Variations
Feel free to experiment with different shapes and sizes for your bread bowls. Incorporating whole grains or nuts adds nutritional value and texture. Alternatively, try adding spices like cinnamon or nutmeg for sweeter versions perfect for desserts.
You might also want to experiment with various types of flour, such as rye or spelt, to create unique flavor profiles. Adding dried fruits or chocolate chips can transform these bowls into sweet treats 7.
Conclusion

Mastering the ultimate sourdough bread bowl recipe doesn’t require years of experience or expensive equipment. With patience and practice, anyone can create bakery-quality bread bowls at home. So why wait? Roll up your sleeves, gather your ingredients, and embark on this delightful culinary adventure. Remember, baking is both science and art—enjoy the process and savor the rewards!
FAQs
Q: Can I speed up the fermentation process? A: While speeding up fermentation isn’t recommended as it affects flavor development, ensuring optimal temperatures between 70°F–78°F (21°C–25°C) helps maintain ideal conditions.
Q: What are the health benefits of eating sourdough? A: Sourdough offers several health benefits due to its lower glycemic index compared to regular bread, aiding better blood sugar control. Additionally, the fermentation process increases mineral absorption and promotes gut health 6.
Q: How do I store my sourdough bread bowls? A: Keep them in a paper bag at room temperature for short-term storage. Freeze individual slices for extended shelf life, reheating when needed.
By following this guide, you’re well-equipped to tackle the challenge of baking stunning sourdough bread bowls. Happy baking!
https://www.pastryeasy.com/how-to-make-a-classic-date-nut-bread-recipe/
https://www.pastryeasy.com/bread-grain-peanut-butter-and-jelly-recipe/
https://www.pastryeasy.com/old-fashioned-oatmeal-brown-bread-at-home/
https://www.pastryeasy.com/vegan-jalapeno-cheese-artisan-bread-recipe/
https://amybakesbread.com/sourdough-bread-bowls
https://www.farmhouseonboone.com/sourdough-bread-bowls
https://bakerbettie.com/easy-bread-bowl-recipe/

One Comment
Comments are closed.