Coconut Poke Cake Recipe: How to Make It Perfectly
Table of Contents
Introduction
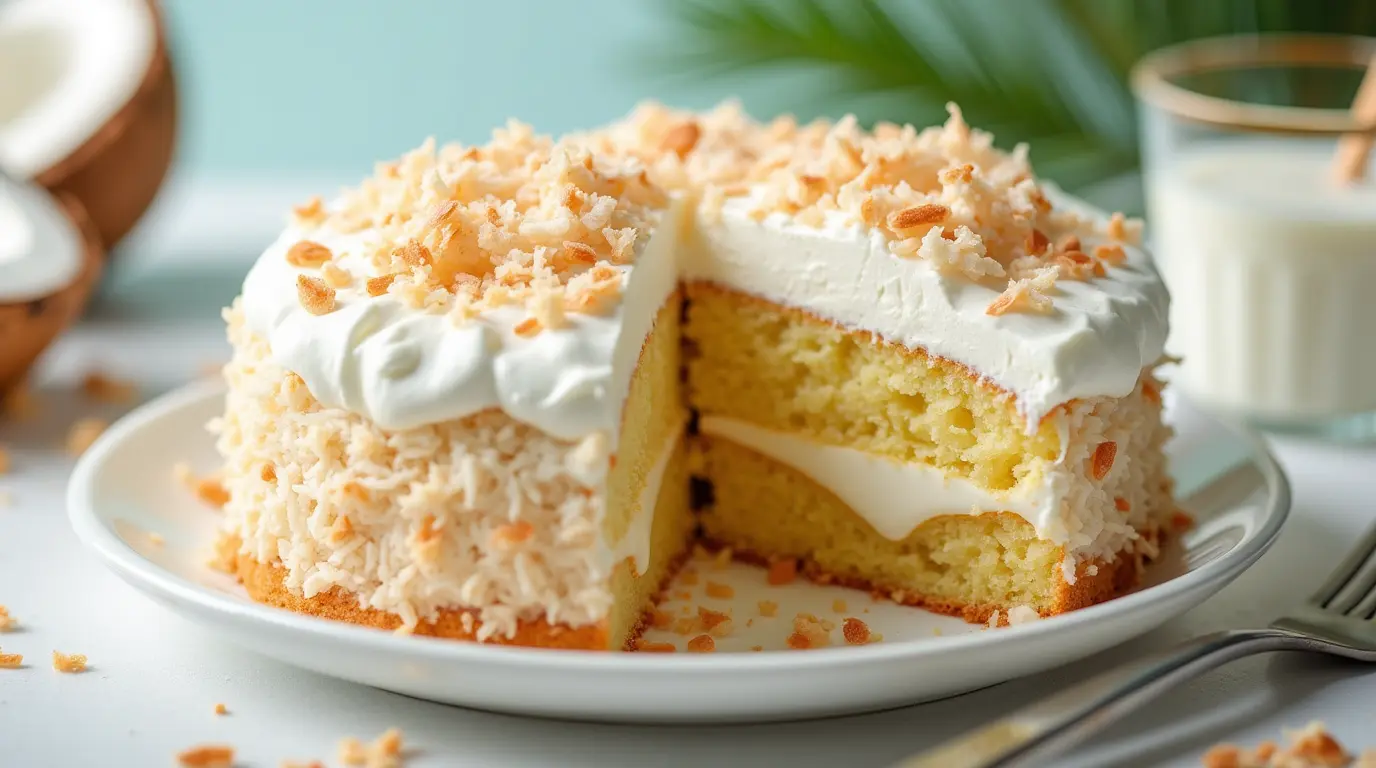
Creating a dessert that delights your taste buds while evoking warmth and nostalgia is a cherished experience. Imagine the aroma of freshly baked cake filling your kitchen, with a texture so moist that each bite melts in your mouth. The subtle hint of coconut transports you to a sunny beach getaway. This is what our coconut poke cake recipe offers—a unique blend of tradition and innovation that transforms ordinary moments into extraordinary celebrations.
In this guide, you will embark on a culinary journey that covers every detail—from gathering the ingredients to achieving the perfect finish on your cake. Whether you’re an experienced baker or new to the world of dessert-making, you will find step-by-step instructions, handy tips, and creative variations to customize your dessert. So, roll up your sleeves and get ready to create a dessert that not only tastes amazing but also tells a story of cherished memories and joyful gatherings..
A Heartfelt Welcome
When you think about a dessert that can turn an ordinary day into a special occasion, you might recall a moment from your childhood—a family celebration, a surprise birthday treat, or simply an indulgent afternoon snack. I remember a time when my kitchen transformed into a sanctuary of sweet aromas and laughter as we baked together. That experience inspired me to perfect this coconut poke cake recipe, a dessert that carries both a rich flavor and a heartwarming story.
The Purpose of This Guide
This article is designed to walk you through the process of creating a perfectly moist and delectable coconut poke cake recipe. Discover tips, tricks, and variations that allow you to adapt the recipe to your taste. By the end of this guide, you will have a dessert that will impress your friends, family, and even your taste buds.
Ingredients and Tools Needed
To ensure your coconut poke cake turns out perfectly every time, it’s essential to have all the necessary ingredients and tools ready. This section will help you gather everything you need before you begin.

Essential Ingredients Table
Below is a detailed table of all the ingredients required for your coconut poke cake recipe. Use this as your shopping list to ensure you don’t miss any key components.
| Ingredient | Quantity | Notes |
|---|---|---|
| All-purpose flour | 1 1/2 cups | Sifted for a smooth batter |
| Granulated sugar | 1 cup | |
| Baking powder | 1 tsp | |
| Salt | 1/2 tsp | |
| Coconut milk | 1 can | Full-fat for rich flavor |
| Eggs | 3 large | Room temperature |
| Vegetable oil | 1/2 cup | |
| Shredded coconut | 1 cup | Unsweetened preferred |
| Vanilla extract | 1 tsp | Enhances flavor |
Necessary Kitchen Tools
To help you navigate the recipe smoothly, make sure your kitchen is stocked with these essential tools:
- Mixing bowls of various sizes
- Measuring cups and spoons
- A whisk and a spatula
- A 9×13-inch cake pan (or a similar-sized baking pan)
- An oven preheated to the required temperature
- A fork or skewer for poking holes in the cake
Having these tools at your fingertips will not only simplify the process but also elevate the overall outcome of your baking adventure.
Step-by-Step Instructions for the Coconut Poke Cake Recipe
Now that you’re ready with all your ingredients and tools, it’s time to dive into the baking process. This section provides detailed, easy-to-follow steps to help you create a cake that’s moist, flavorful, and unforgettable.
Preparing the Cake Batter
1. Preheat and Prepare
- Preheat your oven: Begin by setting your oven to 350°F (175°C). This ensures that the cake bakes evenly.
- Grease your pan: Lightly grease your cake pan with a bit of vegetable oil or non-stick spray to prevent the cake from sticking.
2. Combine Dry Ingredients
- In a large mixing bowl, sift together the all-purpose flour, granulated sugar, baking powder, and salt. Sifting helps to remove any lumps and ensures a light, airy texture.
3. Mix Wet Ingredients
- In a separate bowl, beat the eggs until they become frothy. Then add the coconut milk, vegetable oil, and vanilla extract. Stir until the mixture is well combined.
4. Create the Batter
- Slowly combine the wet ingredients with the dry ingredients. Mix gently until just incorporated. Overmixing at this stage can lead to a dense cake, so ensure you mix until you no longer see pockets of flour.
Baking Process
1. Pour and Smooth
- Pour the batter into your prepared cake pan. Use a spatula to spread the mixture evenly across the pan, ensuring a uniform thickness for even baking.
2. Bake to Perfection
- Place the pan in your preheated oven. Bake for about 25 to 30 minutes. To check for doneness, insert a toothpick into the center of the cake. If it comes out clean, your cake is ready.
3. Cool Down
- Once baked, remove the cake from the oven and let it cool in the pan for 10 minutes. Then, transfer the cake to a wire rack to cool completely.
Poking and Soaking Process
1. Poke Strategic Holes
- After your cake has cooled slightly, use a fork or a skewer to poke small holes evenly across the top. This is a crucial step that allows the soaking liquid to penetrate every bite of your cake.
2. Infuse with Coconut Milk
- Slowly pour additional coconut milk over the cake. The liquid will seep into the holes, ensuring each slice is moist and infused with rich coconut flavor.
Finishing Touches
1. Decorating Ideas
- Enhance your cake by topping it with extra shredded coconut. You can also drizzle a light glaze over the top for an added burst of flavor.
- Consider adding a sprinkle of lime zest to give your dessert a fresh, tangy twist.
2. Final Adjustments
- If you prefer your cake a bit sweeter, you might consider a light dusting of powdered sugar or a drizzle of caramel sauce. Tailor the finishing touches to suit your personal taste and the occasion.
Tips, Tricks, and Variations
Baking is as much an art as it is a science. With these tips and creative variations, you can make the coconut poke cake recipe uniquely yours.
Best Tips for a Moist and Flavorful Cake
- Room Temperature Ingredients: Ensure that all your ingredients, especially eggs and coconut milk, are at room temperature before mixing. This promotes better emulsification and a smoother batter.
- Gentle Mixing: Overmixing can result in a tough cake. Mix just until the ingredients are combined.
- Poking Precision: Use a fork or skewer to create evenly spaced holes. This allows the coconut milk to distribute evenly, ensuring every bite is moist.
- Resting Time: Allow the cake to rest after baking and after adding the soaking liquid. This gives the flavors time to meld together beautifully.
Creative Variations
Alternative Flavors and Add-ins
- Tropical Twist: Add a hint of lime zest or a drizzle of mango puree for a refreshing tropical variation.
- Nutty Surprise: Incorporate chopped macadamia nuts or toasted almonds into the batter for an extra crunch.
- Chocolate Infusion: For a richer dessert, swirl in some melted dark chocolate or add cocoa powder to a portion of the batter.
- Gluten-Free Version: Substitute the all-purpose flour with a gluten-free blend to accommodate dietary restrictions.
Dietary Adaptations
Vegan Modification
- Egg Substitutes: Use flax eggs (1 tablespoon ground flaxseed mixed with 3 tablespoons water per egg) instead of chicken eggs.
- Dairy-Free Alternatives: Ensure you use coconut milk or another plant-based milk to keep the recipe vegan-friendly.
Low-Sugar Option
- Sugar Substitutes: Consider using natural sweeteners like maple syrup or coconut sugar. Adjust the quantities to suit your taste and maintain the right balance of moisture.
Nutritional Information and Data Sources
Understanding the nutritional profile of your dessert can enhance your overall baking experience. Here’s a brief overview of what you can expect from a slice of coconut poke cake:
- Calories: A typical slice of this cake (approximately 1/12 of the recipe) contains around 250-300 calories.
- Fats: The full-fat coconut milk contributes healthy fats, essential for energy and cellular functions.
- Proteins: Eggs and flour provide a modest amount of protein, which helps keep you satisfied.
- Carbohydrates: The sugar and flour work together to deliver the energy you need, balanced by the fiber from the shredded coconut.
For those who are health-conscious, these values can be fine-tuned by adjusting the ingredients, such as opting for reduced sugar or lower-calorie alternatives. If you wish to explore further, consult nutritional databases like the USDA FoodData Central or reputable health sites that provide detailed information on individual ingredients.
Frequently Asked Questions About Coconut Poke Cake Recipe

What makes the coconut poke cake recipe so moist?
The secret lies in the unique poking and soaking process. By creating small holes in the cake and infusing it with extra coconut milk, you ensure that every slice remains deliciously moist.
Can I use alternative ingredients in my coconut poke cake recipe?
Absolutely. You can substitute ingredients to cater to dietary preferences. For instance, use a gluten-free flour blend for those with gluten sensitivities, or replace eggs with flax eggs for a vegan version.
How do I store leftover coconut poke cake?
Store your cake in an airtight container in the refrigerator for up to 3 days. For extended freshness, freeze individual portions and thaw them when needed. This way, you can enjoy your dessert without sacrificing its delightful moisture.
What are common mistakes to avoid when making a coconut poke cake?
- Overmixing the batter, which can lead to a dense texture.
- Skipping the resting time after baking, which is crucial for flavor infusion.
- Failing to evenly distribute the soaking liquid, resulting in uneven texture.
Can the coconut poke cake recipe be adapted for dietary restrictions?
Yes, the recipe is highly versatile. Whether you’re aiming for a gluten-free, vegan, or low-sugar version, adjustments can be made without compromising the overall flavor and moisture of the cake.
Conclusion
Baking a coconut poke cake that is both moist and bursting with tropical flavor is more than just following a recipe—it’s about crafting an experience that celebrates the joy of cooking and the art of dessert making. As you follow this guide, remember that every step, from mixing the batter to the final decorative touches, is an opportunity to infuse your personal style and creativity into the cake.
Imagine the smile on your loved ones’ faces as they take the first bite of a dessert that embodies both tradition and innovation. You are not just creating a cake; you are creating a memory. With these detailed instructions, helpful tips, and creative variations, you are fully equipped to bring this exquisite dessert to life in your own kitchen.
Take the plunge and start your baking adventure today. Your coconut poke cake recipe awaits—ready to transform a simple dessert into a moment of pure joy. Share your experience with friends and family, and don’t hesitate to experiment with new flavors and techniques. Every slice tells a story, and yours could be the next unforgettable chapter in your culinary journey.
Additional Insights and Pro Tips

Enhancing the Experience
- Set the Mood: Play some soft music or create a cozy environment while you bake. This not only makes the process more enjoyable but also helps you focus on the intricate details of the recipe.
- Document Your Journey: Take photos and note down any changes you make to the recipe. This will serve as a useful reference for future baking sessions and help you perfect your version over time.
Practical Troubleshooting
- If your cake seems too dry: Consider increasing the amount of coconut milk in the soaking process or reducing the baking time slightly.
- If the cake is too sweet: You might experiment by reducing the sugar by a small margin. Remember, the natural sweetness of coconut can sometimes balance the flavors even with less sugar.
- Texture Concerns: Ensure your ingredients are at room temperature to prevent the batter from curdling or separating. Consistency in the mixing process is key to achieving that perfect, fluffy texture.
Step-by-Step Recap
- Preheat and Prepare: Start with a preheated oven and a well-greased pan.
- Mix Dry and Wet Ingredients Separately: Sift the dry ingredients and gently combine with the wet ingredients.
- Combine Gently: Mix until just incorporated to avoid overworking the batter.
- Bake: Follow the recommended time and temperature.
- Poke and Soak: Use a fork or skewer to create holes and pour in extra coconut milk for maximum moisture.
- Decorate: Add your personal touch with toppings like shredded coconut or a citrus glaze.
Experimenting with Variations
As you grow more comfortable with the basic recipe, consider exploring these variations to keep your dessert menu fresh and exciting:
- Citrus Infusion: Add lemon or lime zest to the batter, or top with a citrus glaze.
- Nutty Elements: Mix in chopped nuts like pecans or walnuts to add a delightful crunch.
- Berry Burst: Incorporate fresh berries either in the batter or as a topping to introduce a tangy contrast to the sweet coconut flavor.
Each tweak you introduce not only personalizes the recipe but also keeps the cooking process engaging. Remember, your kitchen is your creative studio—experiment boldly and relish the delicious outcomes.
Your Journey to Dessert Mastery
Creating a coconut poke cake is more than a recipe; it’s a chance to embrace the art of dessert-making with a personal twist. You now have the roadmap to create a dessert that is not only visually appealing but also rich in flavor and texture. With the clear instructions provided in this guide, you’re empowered to take control of your kitchen, experiment with flavors, and master the nuances of baking.
Whether you’re preparing for a family gathering, a special celebration, or simply indulging in a quiet afternoon treat, your coconut poke cake recipe is your ticket to creating moments that are both delightful and memorable.
Call to Action
Now that you have all the insights and detailed steps, it’s time to put your skills to the test. Head to your kitchen, gather your ingredients, and embark on your baking journey. Share your creation on social media or with your loved ones, and let your culinary masterpiece spark joy and inspiration.
If you have any questions or need further tips along the way, feel free to reach out. Your next great dessert adventure starts with this one unforgettable coconut poke cake recipe. Enjoy every bite, and happy baking!
By following this comprehensive guide, you’re not just making a dessert—you’re creating an experience that will resonate with your taste buds and your heart. This article is crafted with care to ensure you succeed in making a cake that is as moist and flavorful as it is visually appealing. Remember, every great dish starts with passion, precision, and a dash of creativity. Embrace the process, and let your culinary instincts shine through.
With this detailed roadmap in hand, you are ready to transform your kitchen into a haven of tropical flavors and heartwarming aromas. Enjoy your journey, experiment with different variations, and most importantly, savor every moment of this delightful baking adventure.
Final Thoughts
Your adventure into making the perfect coconut poke cake is a journey that promises not only a delectable dessert but also a treasure trove of memories. The process—from the precise measurements to the careful steps of baking, poking, and soaking—is designed to give you a cake that’s moist, flavorful, and truly unique.
Take pride in your work, share your success, and let this guide serve as a constant reminder that great desserts are made with love, creativity, and a willingness to explore new horizons. The next time you step into your kitchen, remember that you have everything you need to create magic with this coconut poke cake recipe.
Your kitchen is your creative space, and each step you take in this recipe is a step toward mastering an art form that brings joy, comfort, and a burst of tropical delight to every bite.
Embrace the flavor, cherish the memories, and let your culinary creativity shine. Your perfect coconut poke cake is waiting—ready to bring smiles, create conversations, and become a beloved part of your dessert repertoire. Enjoy the journey, and let every bite remind you that you are capable of creating something extraordinary.
Happy baking, and may your kitchen always be filled with the sweet aroma of success!
https://www.pastryeasy.com/coffee-cake-recipe-with-oatmeal-streusel/
https://www.pastryeasy.com/recipe-vegan-oat-cake-how-to-make-a-moist/
https://www.pastryeasy.com/lemon-dump-cake-recipe-8-secrets/
https://www.allrecipes.com/recipe/7994/coconut-poke-cake
https://aldentediva.com/2024/10/05/coconut-cream-poke-cake/
https://www.pastryeasy.com/butter-pecan-pound-cake-recipe/
https://www.pastryeasy.com/crack-cake-recipe-how-to-make-5-irresistible/
One Comment
Comments are closed.